In the right light, at the right time, everything is extraordinary. Aaron Rose
They don’t call it the ‘Magic Hour’ for nothing.
Also known as the ‘Golden Hour’, it’s that magical stretch of light just after the sun rises or just before the sun sets. The shadows are softer, the colors are richer, and the warm light casts a golden glow on everything it touches.

I don’t think it’s any secret that it’s my favorite time of day…and if you’re looking for magic, shooting during the golden hour is easiest way to find it.
So what makes the Golden Hour golden? Well, it has to do with the low angle and proximity of the sun to the earth. With the sun hanging low along the horizon, the sun’s rays have to travel a greater distance through more of the Earth’s atmosphere. This both reduces the intensity of the sun’s rays and causes more of the blue wavelengths to be scattered so that the remaining light appears more reddish.
It’s also important to note that, depending on the time of year and where you live, the term “hour” can be more of a figurative expression. Right now, as we approach the summer solstice, and for me, living generally in the center of the US, the golden hour starts around 7:30 p.m. and lasts until about 8:30 or so.
Feel free to geek out and calculate your own golden hour timeframe here!
So now you know when to find to the magic hour, let’s talk about where and how to find the magic in the magic hour.
Spoiler Alert! You’re gonna need some bug spray. <insert wink here>
Down the street from my house, there is a wooded trail that is kept mostly natural (meaning the city doesn’t mow it). And wherever I see a little pool of light peaking through the trees…that’s where I go.
Light = Magic.

Now here’s what this looks like in real life.
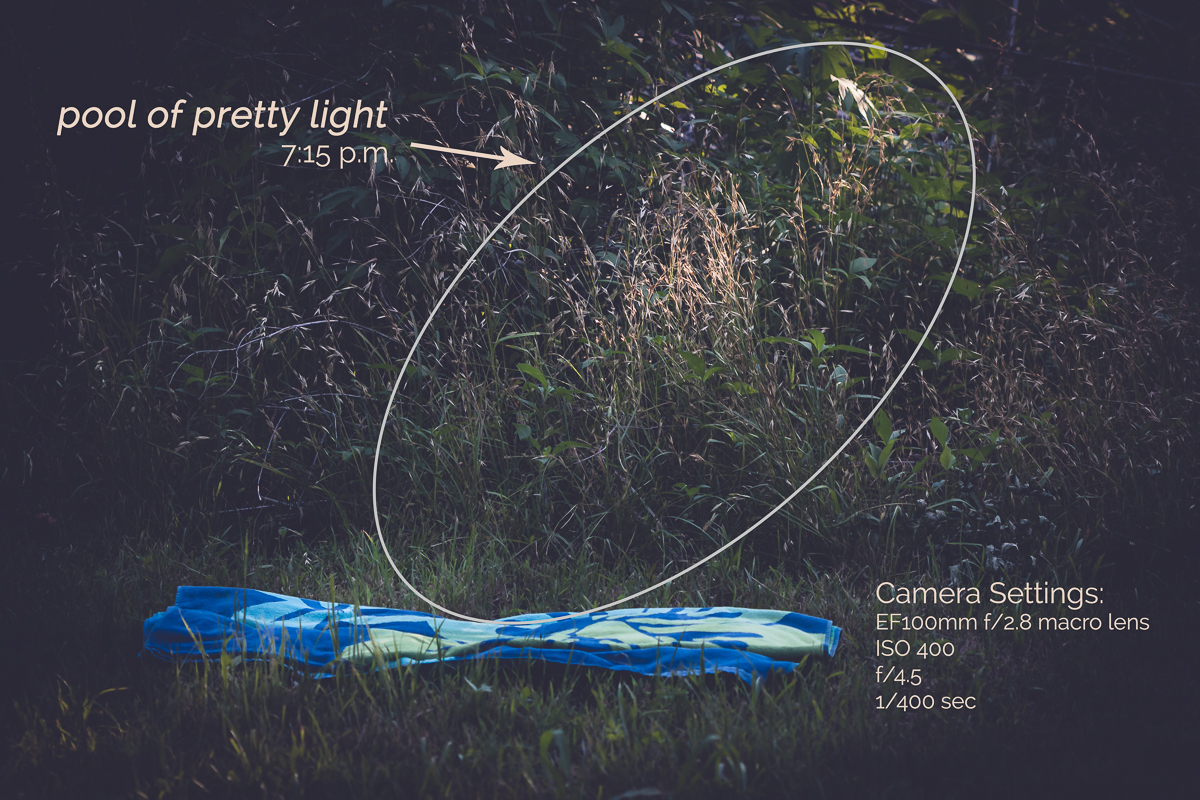
In the photo above, I’ve pulled back so you can see the entire scene. I’ve enhanced the brightness of the light pool in my photo so that it stands out in this post, but notice that the entire frame isn’t lit…just that one little pocket of light streaming through the trees. Also, notice the time – technically not in the golden hour, but the light is still somewhat soft, especially because of the way it’s filtered through the trees.
Next, notice the towel which is where I was kneeling for the shot.
Sidenote::Yes, I checked for critters before I got too close.
Now see the light coming in from upper-right part of the scene? I was shooting towards the light. This means that these photos are backlit. And shooting with backlight is my very favorite way to photograph the light.
OK. Let’s talk about the photo nitty-gritty…all of the photos in this post were taken with my Canon 70D camera with my Canon EF100mm f/2.8 macro lens. I shoot in manual mode in RAW format. (In the interest of not bogging down this post too much, you can read more about RAW vs. JPEG here.)
In the photo below, I set my aperture to f/3.5…this means that I have a very wide/open aperture which means that my photos will have a very shallow depth of field.

And with this shallow depth of field, the rest of the background will be blurred, and where the light falls on those out of focus areas, it creates those enchanting little orbs of light or color known as bokeh.
Bokeh = Magic.
So I’ll be the first one to admit that shooting in backlight can be tricky. There are a lot of variables at play when shooting with backlight. Here are some things to experiment and play with. And notice that I used the words ‘experiment‘ and ‘play‘ because that’s what we’re doing! We are not trying to recreate some great work of art. We are not attempting to reinvent the wheel. We are not looking to achieve the ‘perfect’ shot. We are learning and growing and giving ourselves permission to play! OK? This is supposed to be fun!
Alright, with all that said, let’s talk about exposure. Because of the amount of light coming in through your lens, it can be challenging for your camera to properly meter the scene. This is where experimentation comes in.
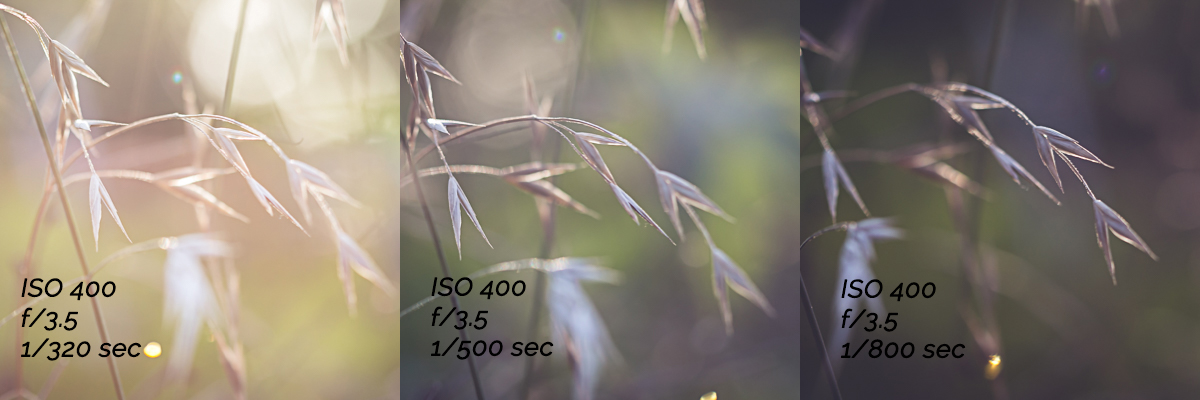
In the series above, I have taken the same basic shot with the same aperture setting, but with three different exposure levels – overexposed, standard exposure, underexposed.
Notice the different vibes that just changing this one setting can create. The overexposed shot is light and bright and has an almost ethereal feeling. In the standard exposure, the colors are richer and the details of the individual shapes stand out more. Then in the underexposed shot, notice how much deeper the tones in the background are. And especially, notice now how the light has created an outline (also known as ‘Rim Light’) along those parts of grass that are in focus.
Rim Light = Magic.
So which exposure is the ‘best’ one? Well….that depends…what story do you want to tell? That’s the beauty here…you get to decide!
Warning! Shameless self-promotion ahead!! If you want to learn more about the basics of exposure, check out my class at Big Picture Classes! Enjoy a free trial where you will receive free access to my class and all of the library of classes that they offer!
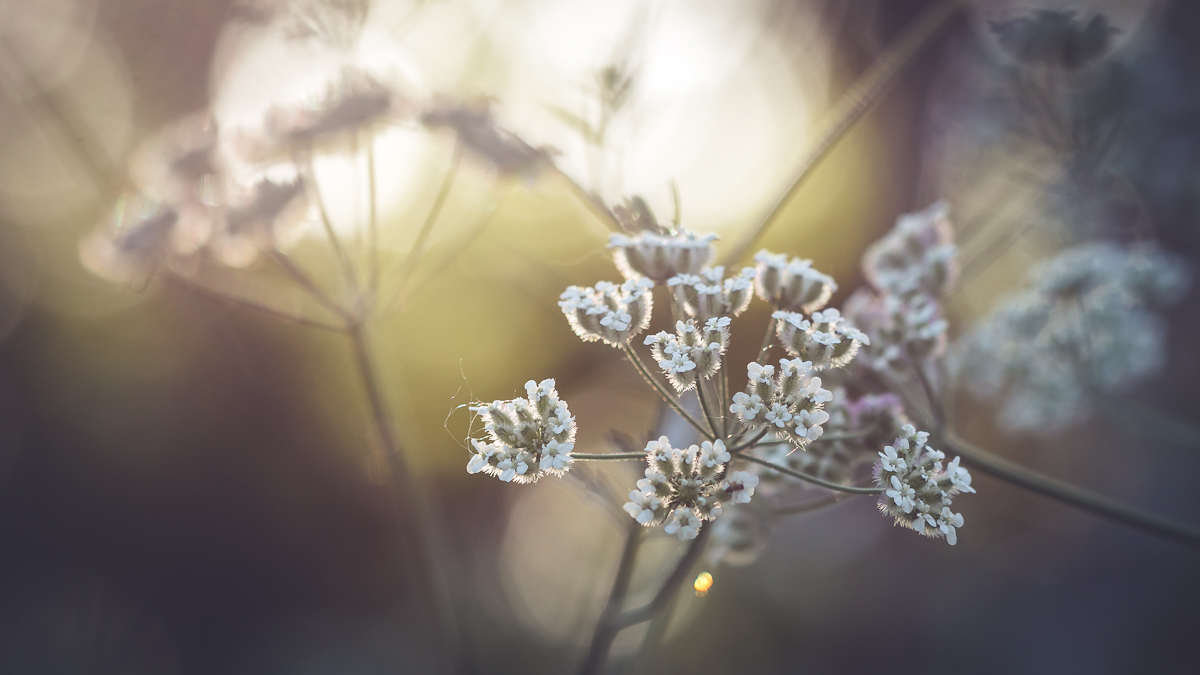
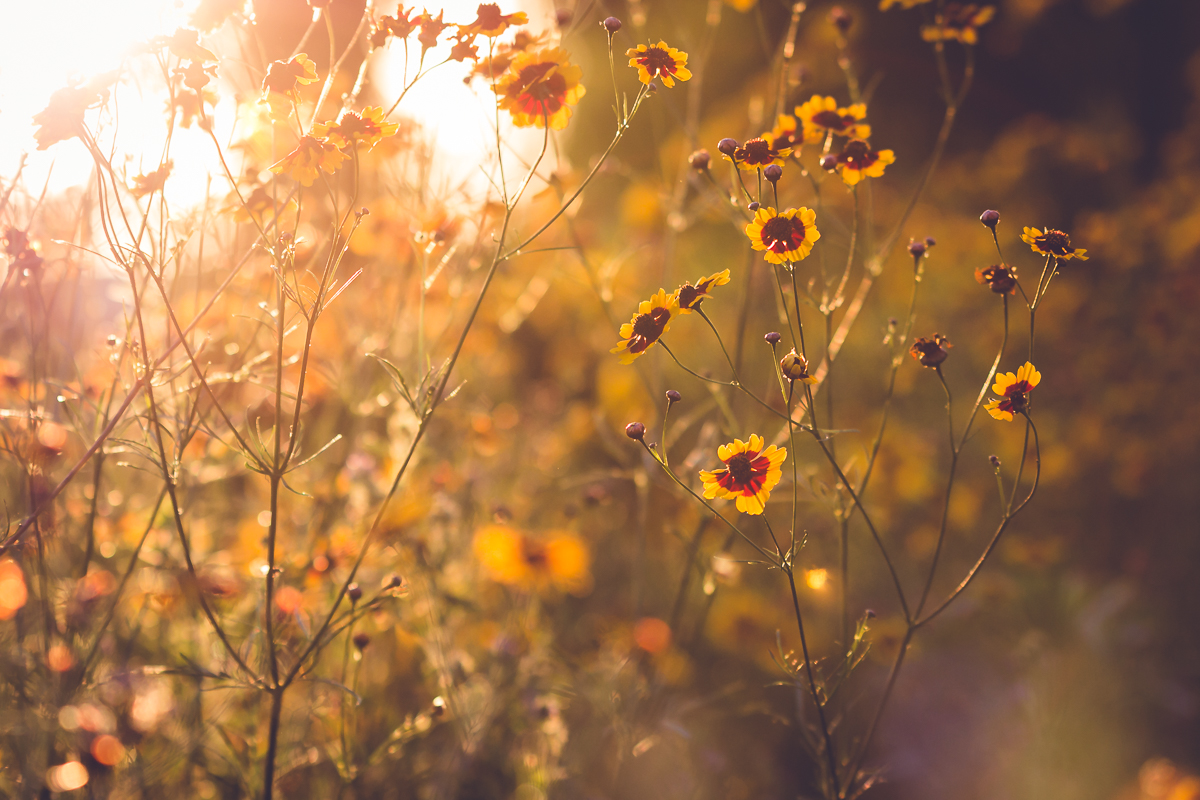
OK. Fast forward about 30 minutes and now the light is really starting to change and take on that glorious golden hue.

Notice again how shooting with a very shallow depth of field (f/3.2) transforms the flowers in the background into little bits bokeh. Also notice the Rim Light along the stem and sepals of the flower in the foreground. I took several shots in this spot where I experimented with the angle at which I took my shot. It’s subtle…the overall composition of the shot is basically the same with the focal point generally adhering to the Rule of Thirds. But by changing my angle, I can adjust how much of that glorious, creamy, buttery sky is in the background of my shot.
Buttery Sky = Magic
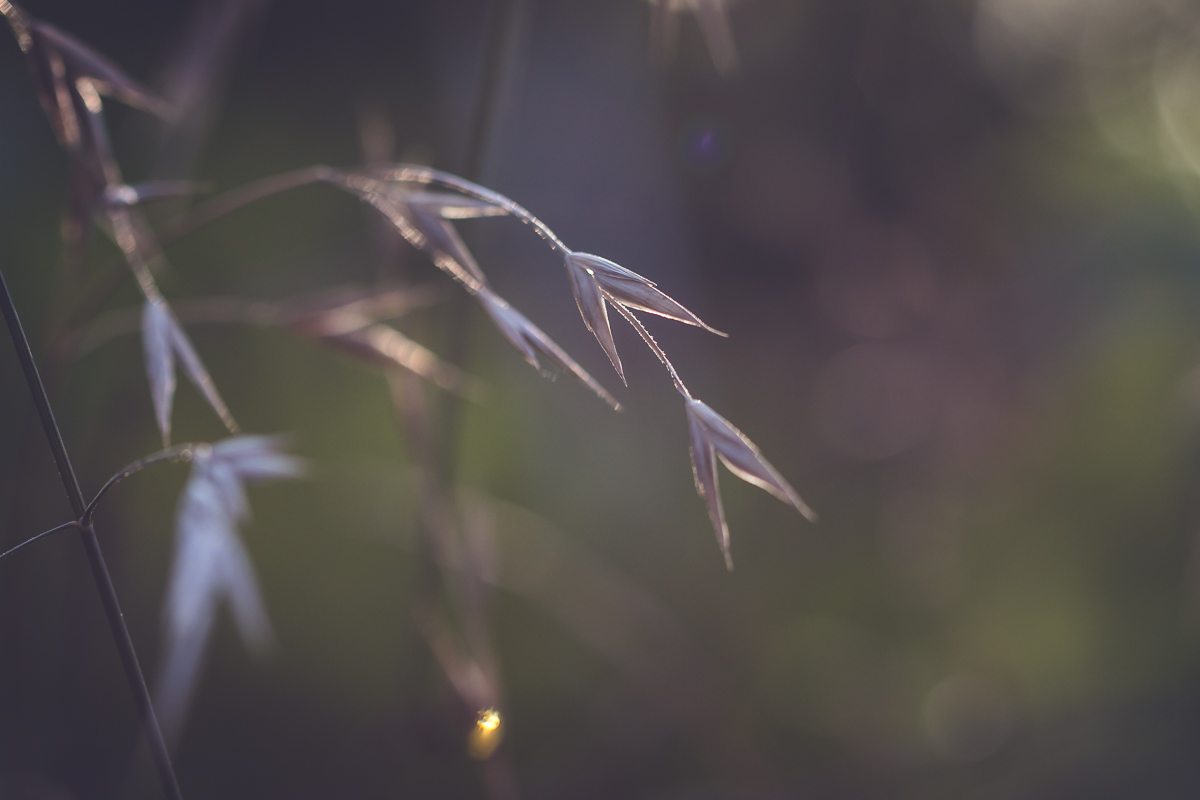
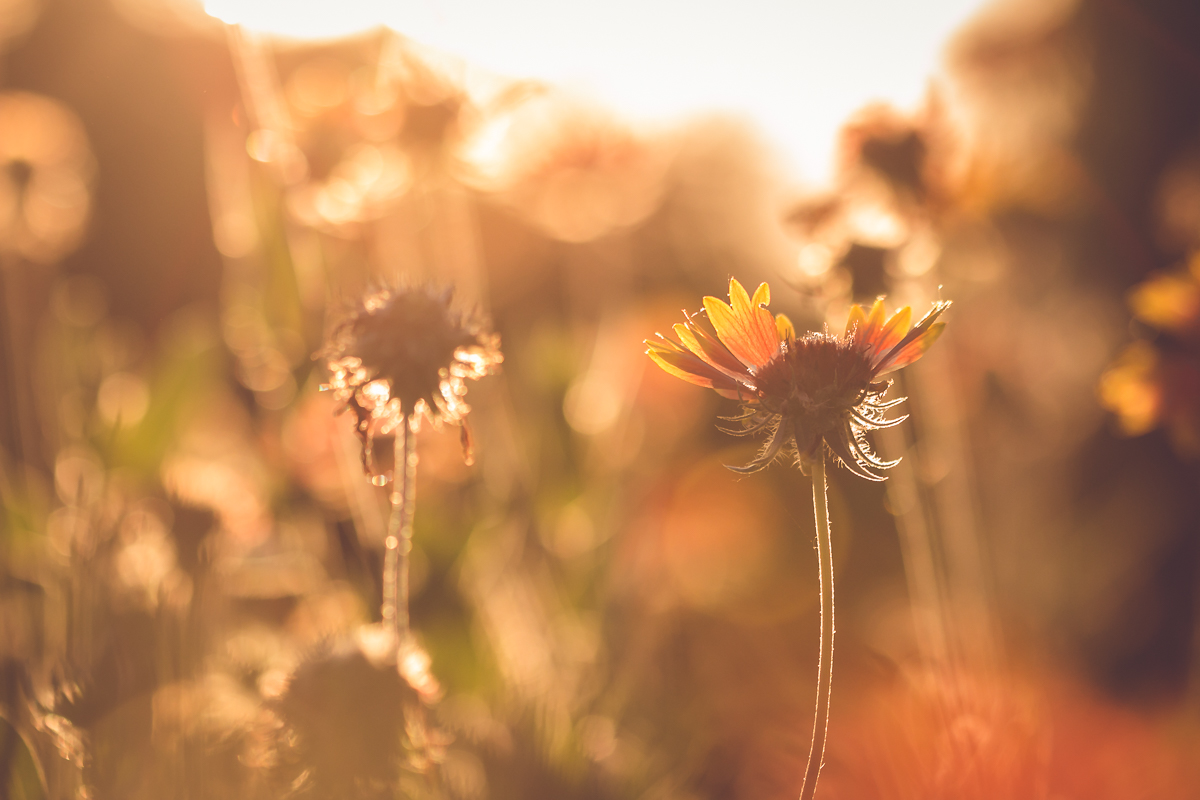
Alright, fast forward to 8:00 p.m. – this was prime time golden hour that night.
Now the sun is even lower in the sky notice how softly the honey-colored light falls on the wildflowers. A little less intensity than before, notice that there isn’t quite as much rim light here. Notice how the bokeh is somewhat smoother with richer tones in the shadowy areas of the scene.

Rich Tones = Magic.
OK…I think you get the picture. The Golden Hour is where it’s at when it comes to finding magic in your photos. There is so much to love about the way the light evolves over the course of 60 minutes. How it transforms an ordinary patch of un-mowed grass and wildflowers into extraordinary little bits of light and color.

One last note…in the spirit of full disclosure, all of these photos have been edited in Lightroom and you can find all of my Lightroom post-processing tutorials here.
Anyway, I hope this photography tutorial has been helpful for you. But even if you’re not into taking pictures, I would just wholeheartedly encourage you to get out and take a stroll in the early morning or late evening. Soak up the golden light and let it inspire you to see beauty in unexpected places. Because that’s what where the magic is. And we could all use a little more magic in our lives.
Love, Kelly
P.S. It makes my heart SO HAPPY to know how many of you are joining in with me on my quest to find the magic this summer. And so with that in mind, I thought it might be fun to create an Instagram tag so that we can find each other and share in each other’s magical moments. So if you like to hang out on Instagram, feel free to tag your images with #oursummermagic.
xoxo
The post Summer Magic::The Golden Hour appeared first on minding my nest.